

You’ll need:

* non-toxic gold spray paint (I recommend Krylon)
* champagne flutes or wine glasses
* painters tape
* plastic or ziplock bag
* plastic gloves
It's time to start...
1. Rip off a 6 inch piece of tape. Center the tape over the base of the glassware, rubbing the bottom edge against the glass. Pull the sides up at a slight angle. As long as the bottom edge is taped smoothly, it’s alright if the top edge of the tape ripples or folds.

2. Bring one side of the tape across the middle of the glass. Although the spray paint I used is non-toxic, I tried to keep the outline far below the lip line.

3. Bring the other side of the tape across so the two pieces meet at a point. Tape on a ziplock or plastic bag while still exposing the bottom edge of the tape.

4. Lightly spray multiple and even coats of paint onto the glass from a couple feet away. Be sure to always spray paint outdoors in a well ventilated area. Allow to dry completely before removing the bag and tape.

5 Your gold plated champagne flutes are finished! Remember, these are not dishwasher safe and should be hand washed only.

Voila! Your glasses are renovated!
Source: http://honestlywtf.com
A combination of Mexican paper flowers and those ever so popular tissue paper pom poms, these vibrant and cheerful flowers make perfect ornaments for any celebration. Plus, they’re incredibly easy to make!

You’ll need:
* 6 – 7 pieces of 180 gram florist crepe paper cut into 20″ x 30″ sheets (it’s important to use heavyweight crepe paper for it’s stretchiness and strength)
* 6 – 7 small binder clips or large paper clips
* 16 gauge floral wire
* heavy duty scissors

First, lay out the sheets of crepe paper and fold each one into an accordion. The folds should measure about 2-3 inches thick and should be creased along the natural, horizontal lines of the crepe paper. Don’t worry about the folds being absolutely perfect! (Click on images to enlarge)

Keep each bundle bound together by a small binder clip or large paper clip.

Working with the outer color first, gradually trim down the length of each sheet in 1-2 inch increments. This will ultimately give the flower its depth.

With scissors, trim the ends into rounded and pointy shapes. Again, don’t worry about being too precise – irregularity will make the flower look more natural! Realign the binder clips to the center of each bundle.

Cut along the folds of each bundle . . .
 . . . until the scissors hit the edge of the binder clip, leaving the center uncut. Repeat the same steps on all four sides.

Unbind each bundle. Lay the sheets on top of each other with the largest, outer color on the very bottom and the smallest, innermost color on top. Be sure to center the sheets as best as possible. Then, start folding all the layers into an accordion.

Roll the bunch inwards and tie a piece of floral wire around the middle.

Secure the wire by giving it a few twists. Fan out the folds, exposing the strips of the first layer.

Gently peel forward one strip at a time and using both hands, stretch the paper open.

I suggest peeling forward every other or every two strips to give the flower a more organic look. And remember to constantly fan out the bundle since some strips may be tucked away between other layers. Once the first layer is done, move onto the next layer and color.

Slowly and gently peel forward all the strips from each layer. Though you might have to adjust some of the petals, the flower will naturally take it’s own shape.

Continue peeling the layers. If a strip is too big or out of place, feel free to use scissors to trim or shape it.

Soon enough, your crepe paper flower will be finished. And I dare you to make just one!

It is beautiful... Isn't it? :)


Source: http://honestlywtf.com

You’ll need:
* 6 – 7 pieces of 180 gram florist crepe paper cut into 20″ x 30″ sheets (it’s important to use heavyweight crepe paper for it’s stretchiness and strength)
* 6 – 7 small binder clips or large paper clips
* 16 gauge floral wire
* heavy duty scissors

First, lay out the sheets of crepe paper and fold each one into an accordion. The folds should measure about 2-3 inches thick and should be creased along the natural, horizontal lines of the crepe paper. Don’t worry about the folds being absolutely perfect! (Click on images to enlarge)

Keep each bundle bound together by a small binder clip or large paper clip.

Working with the outer color first, gradually trim down the length of each sheet in 1-2 inch increments. This will ultimately give the flower its depth.

With scissors, trim the ends into rounded and pointy shapes. Again, don’t worry about being too precise – irregularity will make the flower look more natural! Realign the binder clips to the center of each bundle.

Cut along the folds of each bundle . . .


Unbind each bundle. Lay the sheets on top of each other with the largest, outer color on the very bottom and the smallest, innermost color on top. Be sure to center the sheets as best as possible. Then, start folding all the layers into an accordion.

Roll the bunch inwards and tie a piece of floral wire around the middle.

Secure the wire by giving it a few twists. Fan out the folds, exposing the strips of the first layer.

Gently peel forward one strip at a time and using both hands, stretch the paper open.

I suggest peeling forward every other or every two strips to give the flower a more organic look. And remember to constantly fan out the bundle since some strips may be tucked away between other layers. Once the first layer is done, move onto the next layer and color.

Slowly and gently peel forward all the strips from each layer. Though you might have to adjust some of the petals, the flower will naturally take it’s own shape.

Continue peeling the layers. If a strip is too big or out of place, feel free to use scissors to trim or shape it.

Soon enough, your crepe paper flower will be finished. And I dare you to make just one!

It is beautiful... Isn't it? :)


Source: http://honestlywtf.com

Application of Makeup consists of infinite techniques and there’s no doubt that makeup makes us look more beautiful, thus we can give so many looks as much as we want, depending upon the Occasion. But whatever there is no competitive to Colors of Arab. Arabian Makeup is one of the most Inspirational makeup that everyone love to do, because Arabian makeup offers us with a wide variety of makeup techniques and one of the most stunning technique Arabian Makeup offers is, that we can make our eyes look broader and volumized with the intensity of colors and application of liners. Following is the detailed method Including a Video Tutorial that will help you to get the Most beautiful Arabian Makeup Look at home.
All you Need is:
- Liquid Foundation (any of your Choice)
- Sticky tape
- Eyeshadow Application Brushes (ranging from smaller to larger) and a eyeliner Brush
- Eyeshadows at least of 4 Different Color (Color may vary other then the one’s in tutorial of your own choice)
- EyeLiner
- Eyelashes (Optional)
- Lipstick (Which goes best with your overall makeup combination)
How to:
- Prepare your Base by applying Liquid Foundation all over your face
- Apply a Sticky tape to make a proper V of the Eyeshadows corner and to avoid extra dust of eyeshades, so that you don’t have to rub you base again.
- On your eyes apply any light colored creamy shade that is sticky so that eyeshadows adheres to your eyes, and gives it full intensity of colors and long hold.
- After application of creamy sticky eyeshadow, Apply the base color lime green eyeshadow color in the inner part of the eye.
- Continue the application of eyeshadow with Turquoise blue color till the end of your eye by merging the turquoise into the lime green eyeshadow.
- With the Crease Brush start applying dark purple eyeshadow by over lapping the Lime green and turquoise eyeshadows from above and continue applying dark purple eyeshadow on to the crease of your eyes working from the outside of the eye to inside by smoothly creating Arch Shape for the dramatic effect.
- Connect the purple eyeshade into V of your eyes starting from the upper outer edge to the lower
- Blend the Purple color above the crease area of your eyes to avoid any sharp lines of your eyeshadows.
- Apply highlight shade just below the highest point of your eyebrows to the eyeshadow and blend for merging.
- Apply the same eyeshadows combination on the lower lid, starting from the inner corner of the eye to the outer.
- Apply eyeliner with the very sharp pointed ends (as shown in video part)
- Fill your eyebrows with a lighter color or a black color to get a complete look of your eyes.
- To neat the skin area under eyes, use a concealer with a foundation brush.
- Apply mascara to define Lashes or you can apply eyelashes for a more depth look of your eyes
- Apply blush-on and then apply a bit of shimmer to your cheek bones.
- At the end now you can apply Lipstick.
- For further detailed application and uses of different Brushes for the Arabian Makeup, check out the video Tutorial to achieve the best look of your Arabian Makeup.

1.

Lancome Ellipse Spectacular Effects Eyeshadow - # 005 Infra Gold
2.

Youngblood Pressed Individual Eyeshadow - Coco
3.

Laura Mercier Eye Liner - Black Ebony
4.

Yves Saint Laurent Ombre Solo Eye Shadow - 01 Iceberg White
5.

Stila Smudge Pots Gel Eye Liner Duo Pack - # 22 Ultraviolet
6.

Shu Uemura Eye Light Dual Ended Pencil - Matte White/ Pearl White
7.
Yves Saint Laurent Mascara Volume Effet Faux Cils ( Luxurious Mascara ) - # 01 High Density Black


Here's magical makeup look with step by step instructions on how to get it!
Shimmery shades of blue and silver give eyes maximum shine and make them pop!


First prepare your face with moisturizer and apply a high coverage foundation to even out the skin, then set it with powder for a matte finish.
You will need a turquoise eyeshadow
with a thin brush apply the same eyeshadow to the lower lash line, or you can use electric blue eyeliner pencil. Carefully blend colors together.


Take a shimmery silver shadow and apply it onto the middle of the upper lid and to the inner corner of the eyes.

Curl lashes and finish eye makeup with two coats of your favorite mascara.
Keep the rest of the face simple - you'll only need a touch of blush and nude or clear lipgloss.

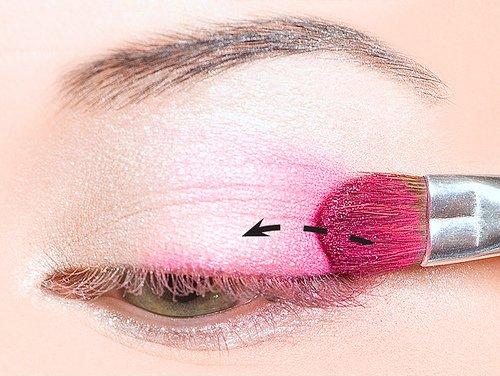
How to make professional make up?



Products:


